Setup Arch Linux on a Dell XPS 13 with Windows 10 dual boot
Intro
This article details steps for setting up a functional Arch Linux installation (with a beautiful Deepin Desktop Environment GUI) on a Dell XPS 13, along with the pre-installed Windows 10 in a dual boot configuration. As a developer, I needed an ultrabook class laptop which wasn’t underpowered. Dell XPS 13 fits perfectly in this segment. It is extremely light, has a unibody design with sturdy hinge and is specwise pretty juicy. After being spoilt with a Macbook Pro for a few years during my previous employment, I never liked the touchpads of non-mac laptops. Dell XPS 13’s was the first one I did. I believe new HP Spectre and Lenovo carbon laptops might have good touchpads but I haven’t played with them yet.
I bought the 2019 version of Dell XPS 13 7390 with the following specs
- Core i7 10th Gen 10710U processor (CPU Benchmark)
- 16GB LPDDR3 2133 MHz RAM,
- 1TB M.2 PCIe NVMe SSD
- 13.3 inch 4K touchscreen display
- Backlit chiclet keyboard with Fingerprint Reader on the power button
It cost me $1705.01 USD inclusive of the 10% Washington state sales tax. Too bad, Dell released the 2020 version a few days after I purchased it but I console myself by thinking that similar configuration is 500 dollars costlier for the 2020 version as of this writing.
Before you start judging me for why didn’t I buy the Developer Edition as it should have flawless driver support for Linux, I would like to clarify that I did consider it but for the similar configuration it was only 10 dollars cheaper and didn’t have a fingerprint sensor; the Dell Website didn’t list these in the spec page of developer edition. I made up my mind to fight driver issues head-on on the Windows edition, should they come up; but touchwood, I didn’t get any that hinder my ability to use the laptop effectively!
Requirements
These set of steps should take less than an hour of your time, assuming you have a fairly performant internet connection as per 2019-2020 standards accessible via a WPA2 encrypted WiFi network.
This article also assumes that you have some basic understanding and familiarity with setting up and running any Linux distro for a while.
This article doesn’t require you to have another laptop with you during the installation process. You should have a USB thumbdrive (a.k.a. pendrive) and the USB-C to USB-A adapter
that comes free with the XPS 13 that may look something like below image.

Why Arch
I have been an Arch user since 2011 and never had any issues with it. ArchWiki has probably the best documentation among all distros, and
AUR has a comprehensive collection of packages that can be installed if not found in official repositories. With a rolling release model so you DO NOT have to
update your distro every 6 months the new version comes, and serves the latest versions of almost all packages from its repositories. Despite of being rolling release,
it is very stable. It is very lean; on top of a basic Linux system it’s the user who makes all choices for installing only the packages required. And because of rolling release nature, you have
the goodies rolling in everyday. The package manager pacman is very fast and processes installation of packages in a jiffy.
Using Arch gives you a feeling of being in control of everything.
Step 1: Download the arch installation image and prepare the Arch Linux boot disk
Boot into the pre-installed Windows 10 of your Dell XPS 13 and download the Arch Linux latest installation image from this page: Arch Linux - Downloads. I chose to download the image over BitTorrent protocol. I find it usually faster than HTTP, and it also frees up bandwidth for other needy users to download from HTTP server.
Once you have the installation image downloaded, you can create a boot disk with it. I use the DD for windows tool for this which can be downloaded from this
download page. The page appears confusing on first looks as it has lots of files listed for download. You can download the file named
dd-0.6beta3.zip and extract it, then open up a command window or powershell window, and navigate to the extracted folder.
The following command will create a Arch boot image in a pendrive that has been inserted and has been assigned the drive letter D. Adjust the command to reflect the correct path
of the downloaded Arch image and the drive letter assigned to the thumbdrive. Ensure that you put the backslashes exactly as shown in the of parameter.
.\dd if=C:\Users\your-windows-username\Downloads\archlinux-2020.01.01-x86_64.iso of=\\.\d: bs=16M
Step 2: Disable Bitlocker and partition the disk for Arch
Microsoft’s Bitlocker disk encryption can annoy you by forcing you to enter a long encryption key when you attempt to boot Windows after Arch installation. So it is a good idea to disable Bitlocker
beforehand. Type Manage BitLocker in start menu and disable it for C drive. Or you can go to Control Panel > System and Security > Bitlocker drive encryption and disable it from there.
Now you need to free some space up for your Linux installation. You can do this by using the Disk Management tool that comes built-in with Windows 10 or the partitioning tools for linux during installation process. In this article we are doing it from Windows. Microsoft has nice online documentation for it here: Disk Management
Press the start button, or the Window key on the keyboard and start typing Create and Format Disk Partitions. Launch the program. It will show you the layout of the hard disk partition
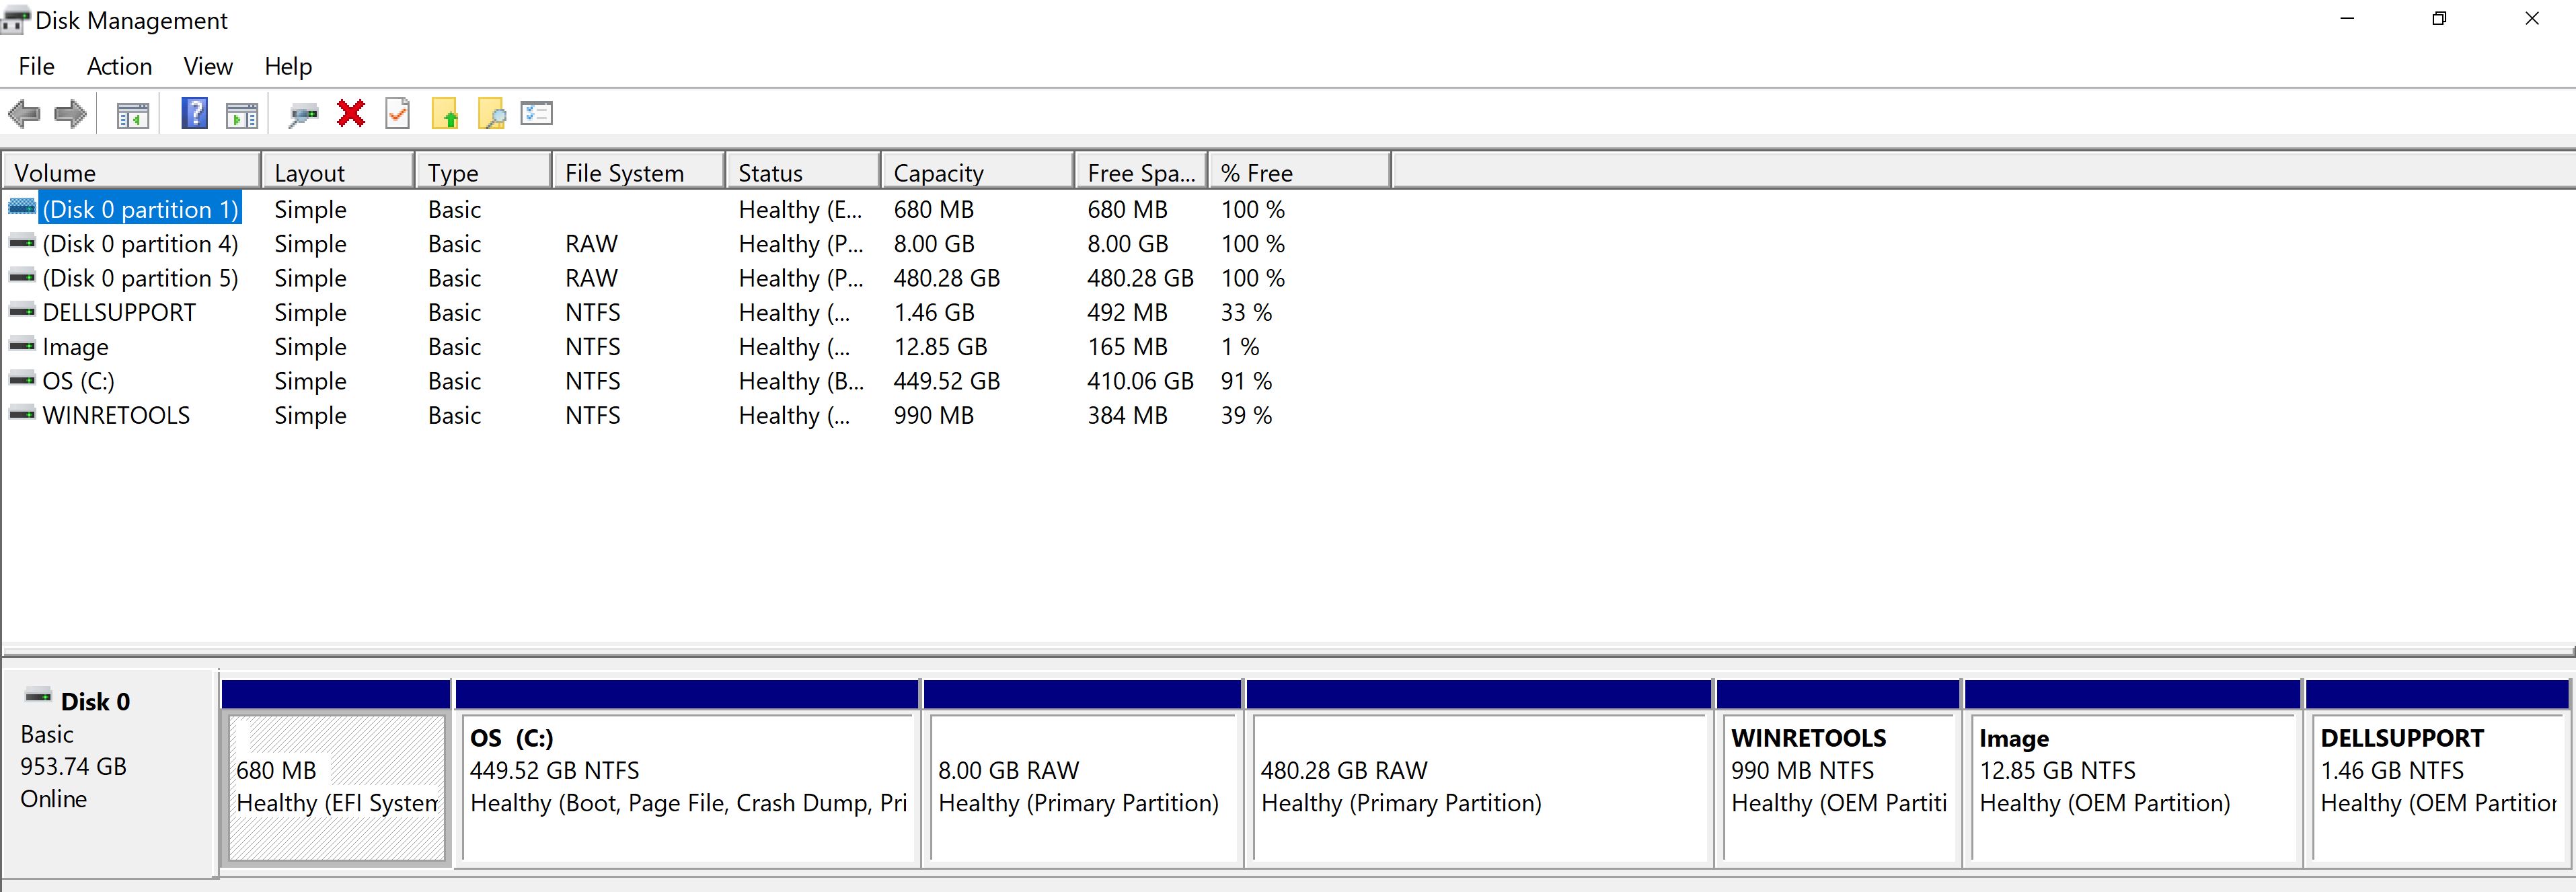
structure. By default, it comes with a 500MB EFI partition, a very large C drive partition, a WINRETOOLS parition, a factory image partition and a DELLSUPPORT parition. You can shrink the
existing C drive parition to make space for Linux.
Right click on the C drive partition and choose Shrink Volume .... Enter the size for the new partition. The row under it should autocalculate and show you the final size of C drive.
Make sure to keep it reasonable for your Windows needs. I entered 500000 and it resulted in a 488GB of raw unallocated free space.
I chose to create a 8GB volume for swap space and remaining space for the / partition. For this, just right click the newly created unallocated space and click New Simple Volume
and enter 8192 MB as the size. Choose to not assign a drive letter when asked. Then right click the remaining space, click New Simple Volume and allocate all the remaining space for the volume
for / partition.
Some people create separate partition for /home as well which in my opinion is actually a good idea, because if for some reason your Linux installation gets borked, you can nuke the / partition,
install a fresh copy of your OS on it (even different distro altogether) and retain everything in the /home by setting the mount point in fstab. This makes everything look like it used to
earlier (assuming certain conditions hold), because of all the user level customizations in the desktop environment being retained in users’ home directory. I find separate partitions for /usr and
/var on personal computers an overkill. For the sake of simplicity we are not creating a separate /home partition in this article.
Ultimate result should look something like the below image. If you have created more partitions, they will appear too.
Step 3: Change SATA mode to AHCI and disable SecureBoot
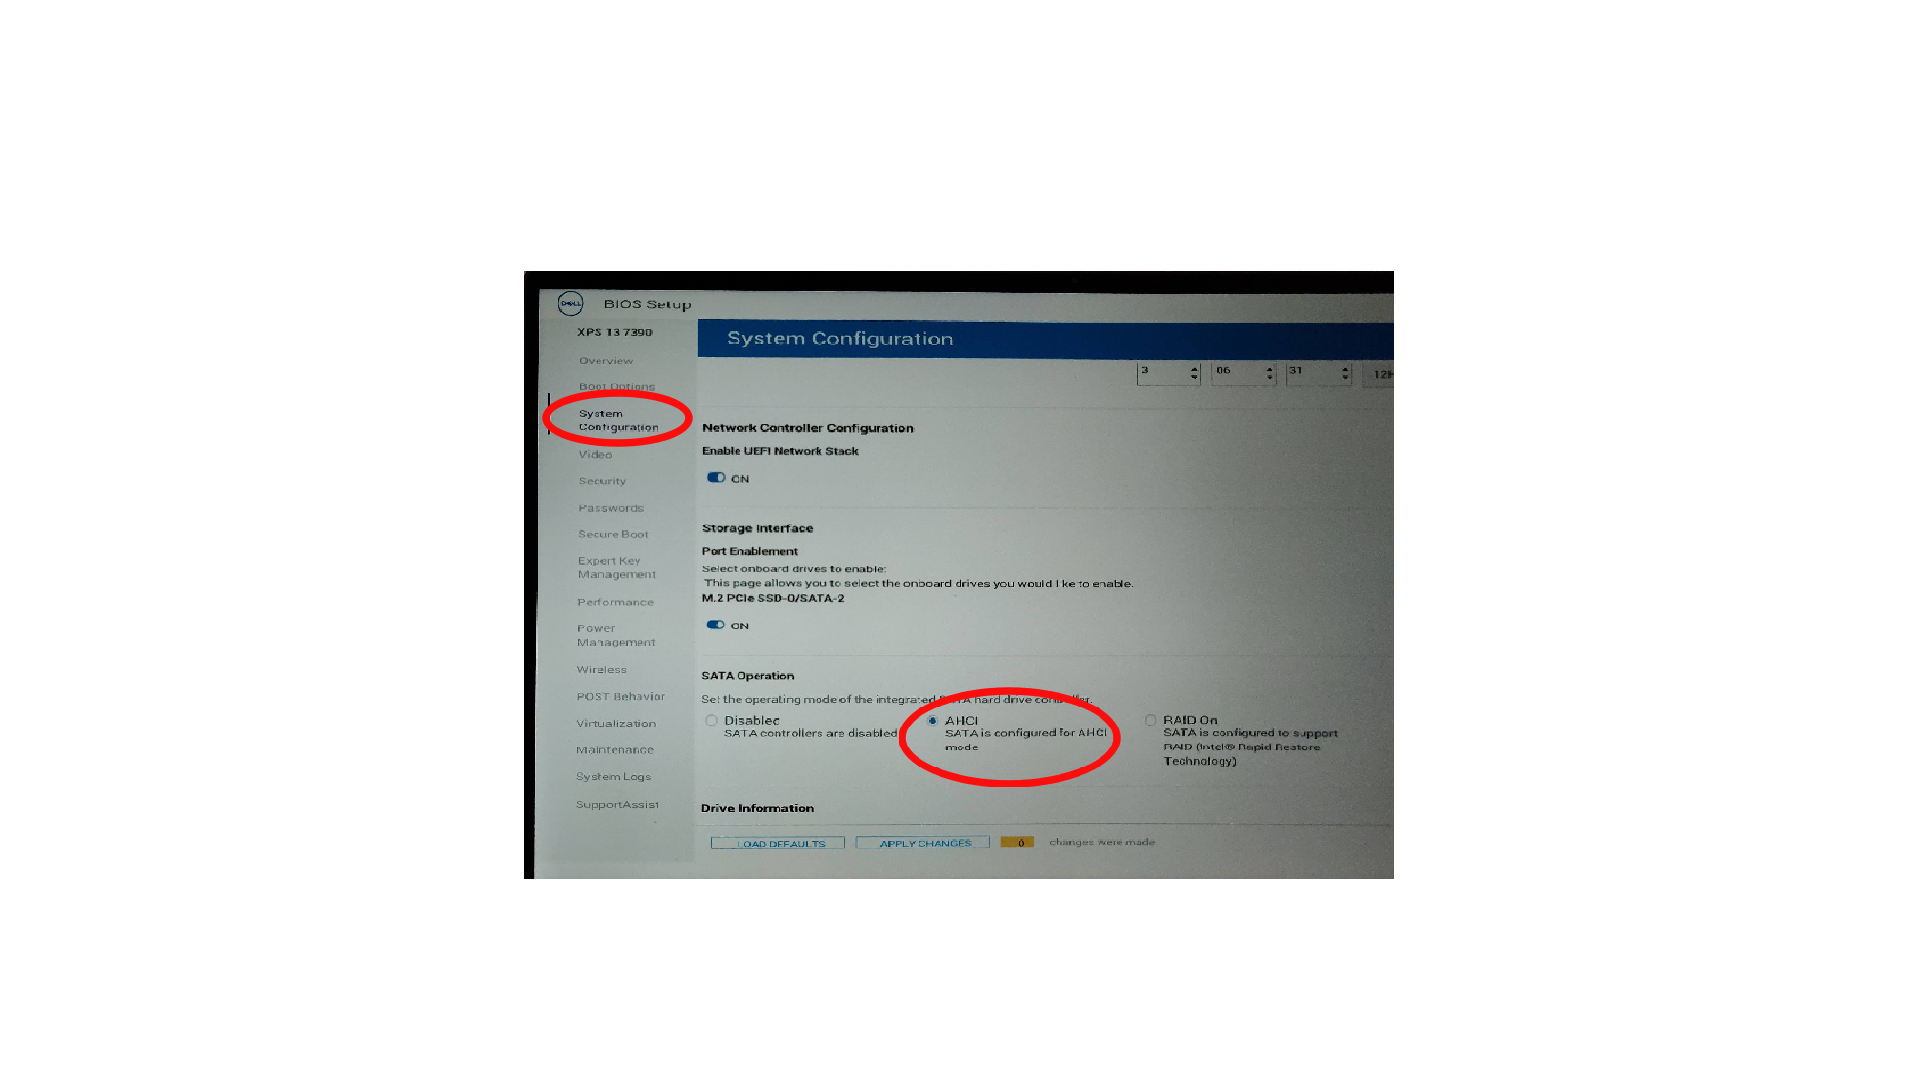
Time to fiddle with some BIOS settings. Before we start installation, we need to change the SATA operation mode in BIOS to AHCI so that the Arch boot disk can recognize the hard disk volumes. If you do not change the SATA mode to AHCI, Arch installation disk won’t recognize your NVMe M.2 hard disk in XPS 13.
Get into the BIOS settings by rebooting the computer and pressing F12 repeatedly until you see the text Preparing one time boot menu in the top right corner of the screen.
Then click BIOS Setup1 and change the SATA operation to AHCI under System Configuration` section of the left sidebar. Here’s a screenshot that may come handy identifying where to do this.
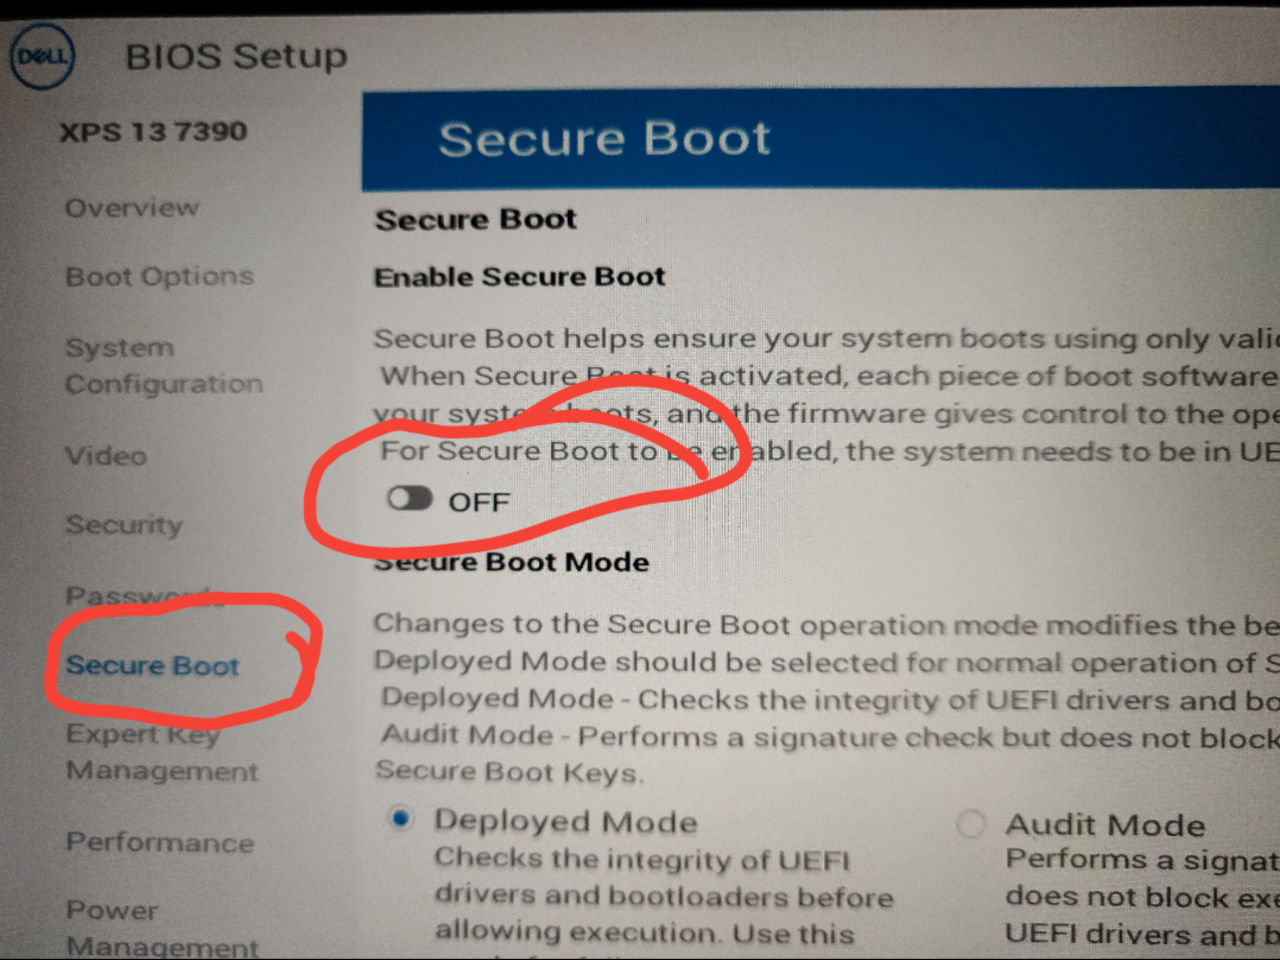
Also, disable SecureBoot in BIOS because it won’t allow setting up Grub which is the de-facto bootloader for Linux distributions. Below screenshot shows how to disable SecureBoot.
Save the change which will result in a system restart.
Step 4: Boot the arch installation media
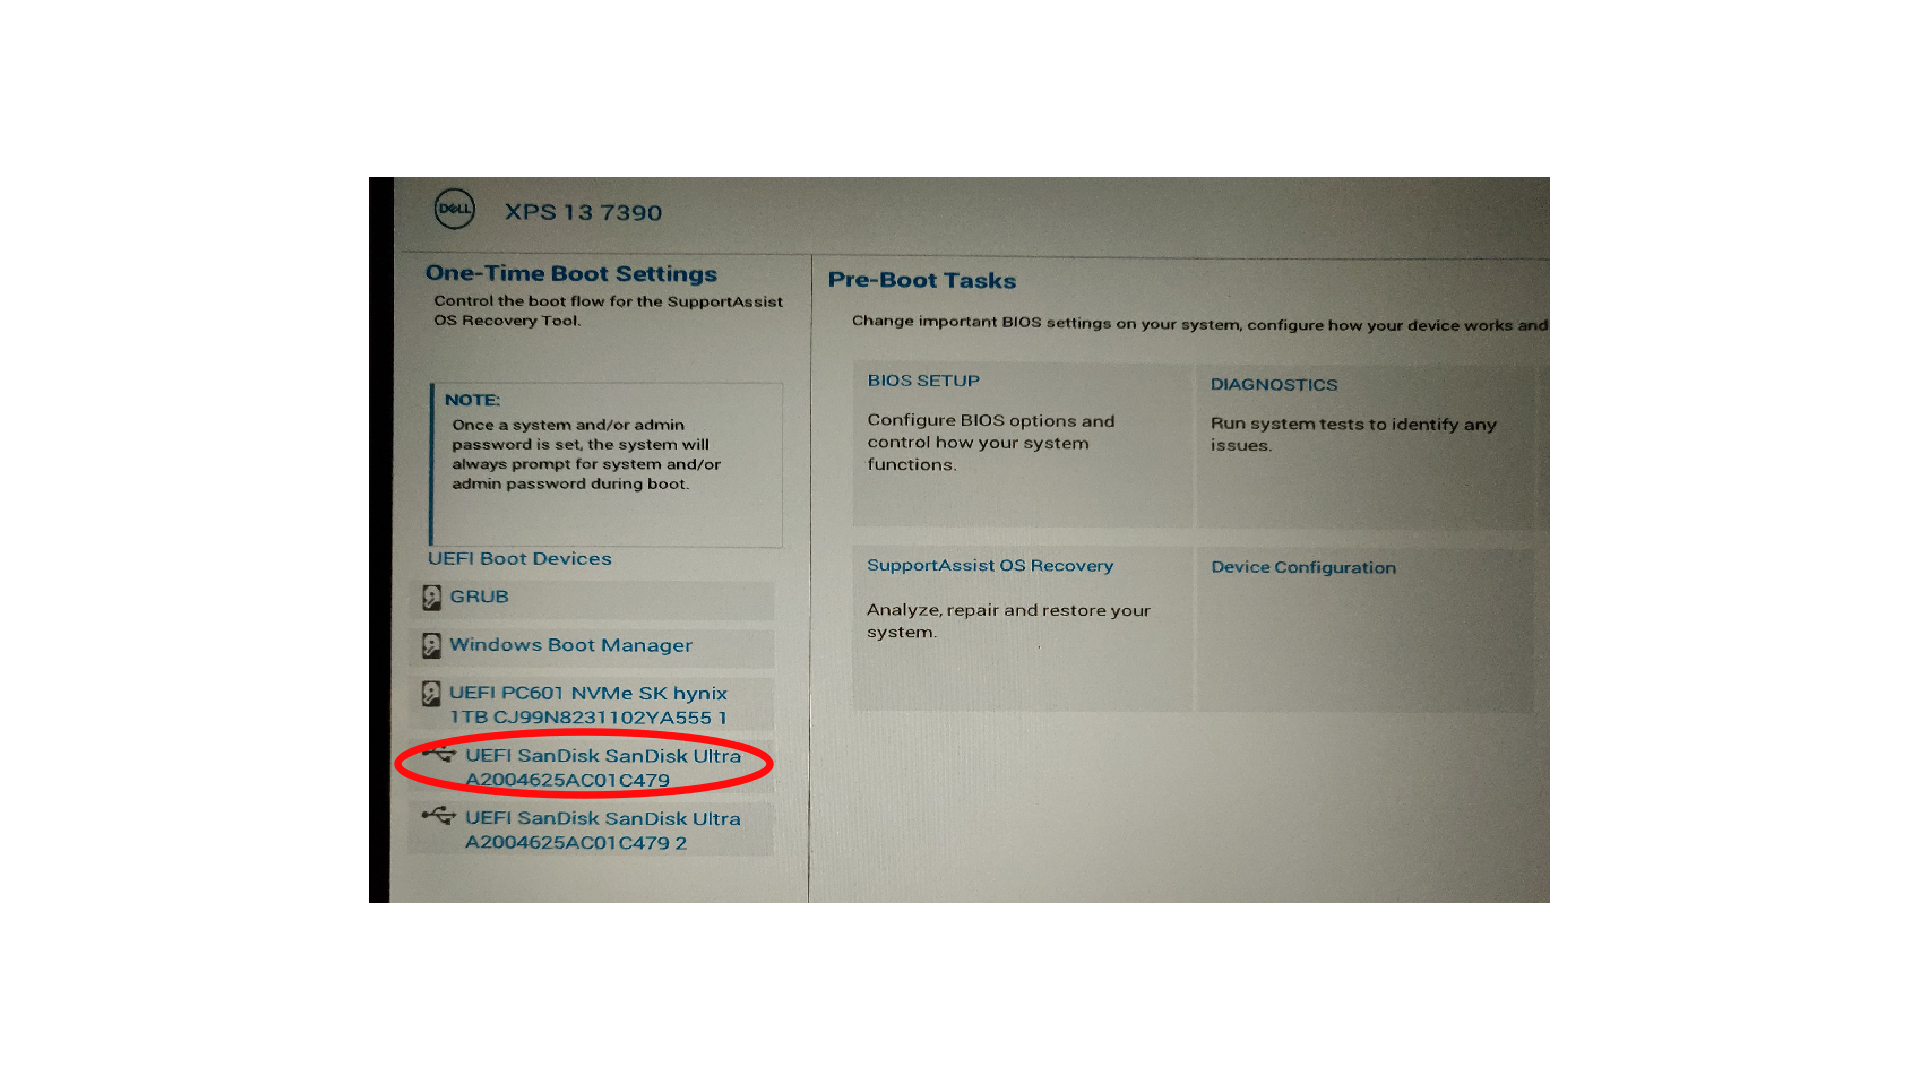
Press the F12 key repeatedly while the ssytem is starting and get into the One Time Boot Menu again and choose the pendrive as the boot device, as shown in the screenshot below.
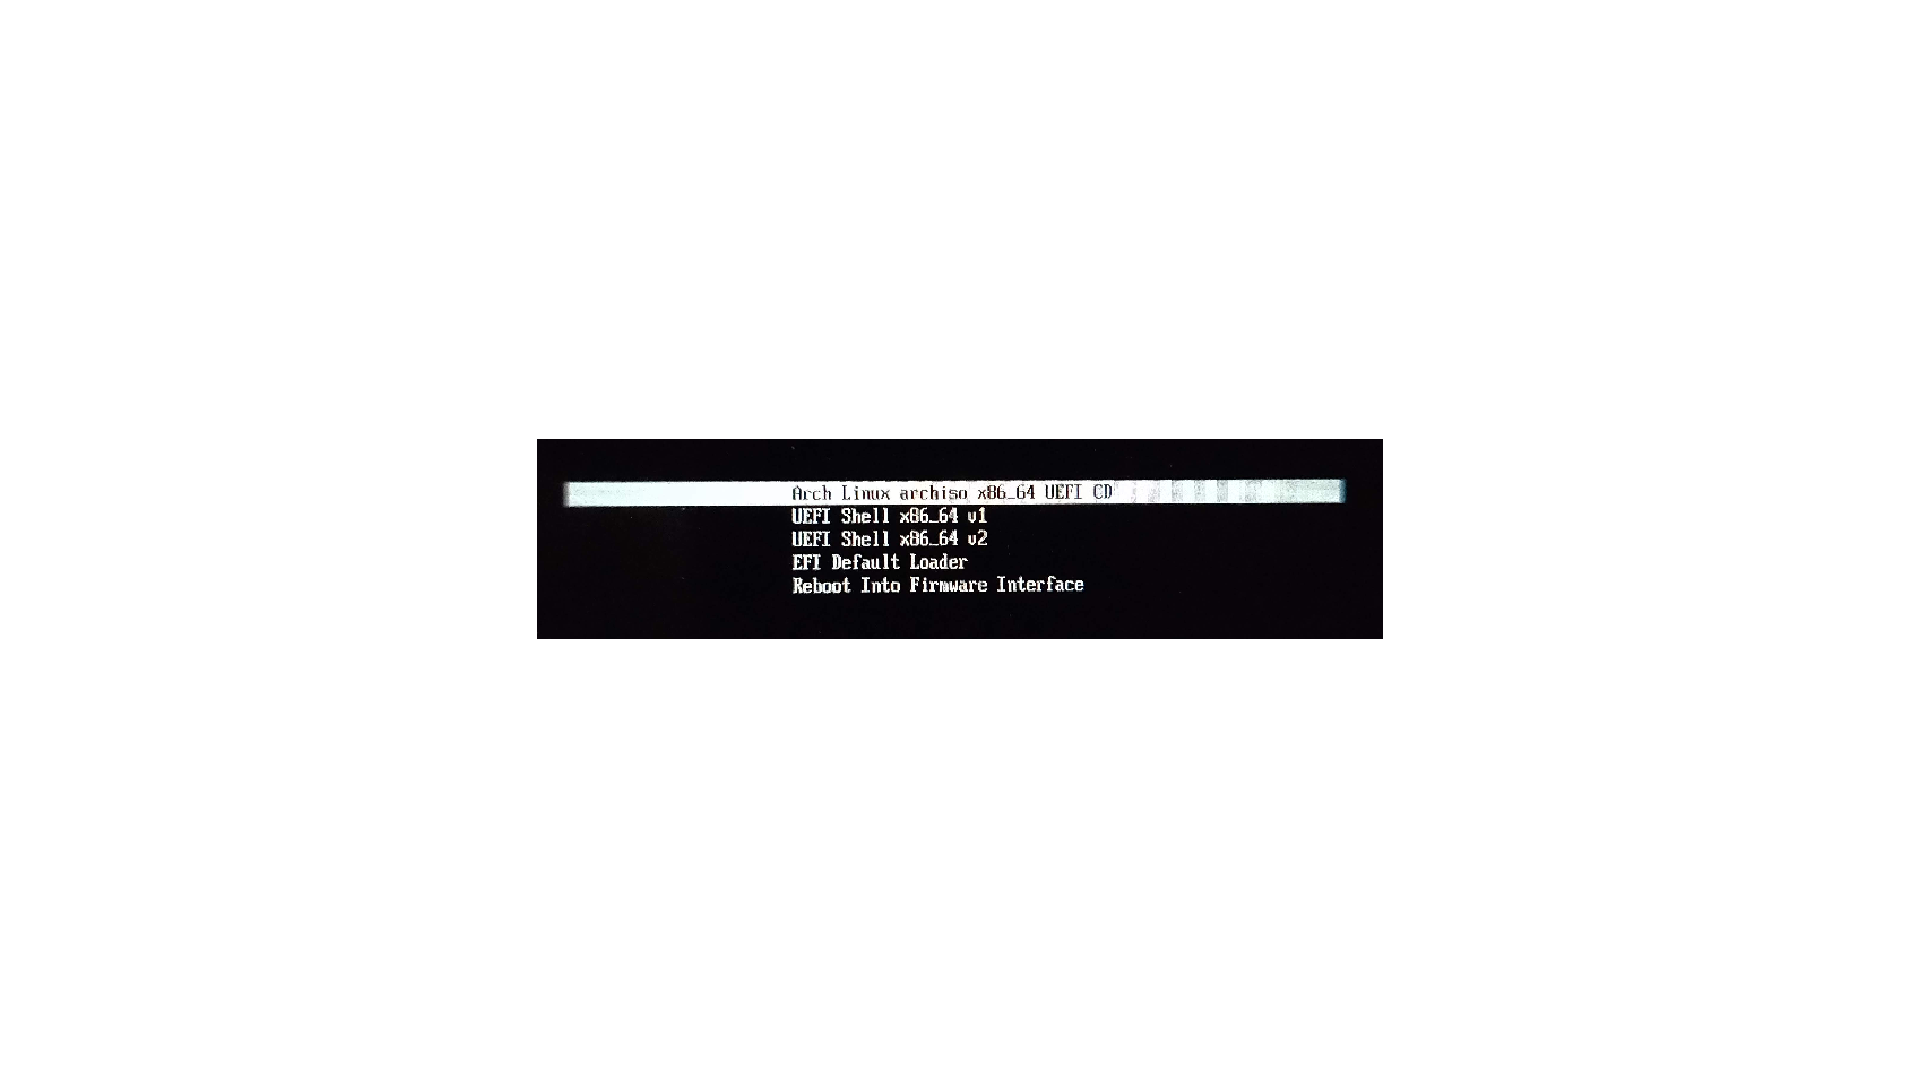
If the disk image was created correctly you should see the Arch Boot Menu as shown below. Choose the first option and press enter.
You should see the root@archiso prompt in a few moments. Please note that, on the 4K display XPS 13, the letters in the terminal during installation look extremely small. However, you have to
face this problem only during installation and after the installation of a GUI everything should start looking good.
Step 5: Connect to the network and enable NTP time sync
I assume you have a WiFi network in range. You can use the wifi-menu command that comes pre-installed in the installation disk. It has a nice curses based UI where you can choose the WiFi network
from a menu of options and enter its password to connect to it. Test the connection by running ping archlinux.org.
Now set the time with NTP by running
timedatectl set-ntp true
Step 6: Setup filesystems
Run the below command
ls /dev/nvme*
to check for the block devices. It is highly likely that you should be able to identify /dev/nvme0n1 as the block device representing your hard disk, which is because all XPS 13s come
with NVME based M.2 SSDs. You can verify this by running fdisk -l /dev/nvme0n1 which should output the list of Windows partition that already exist and the raw partitions.
Carefully check the output of the fdisk command above, and figure out the partition number for the swap and / partitions that we created in Step 1. For me, the output looks like this.
fdisk -l /dev/nvme0n1

Disk /dev/nvme0n1: 953.89 GiB, 1024209543168 bytes, 2000409264 sectors
Disk model: PC601 NVMe SK hynix 1TB
Units: sectors of 1 * 512 = 512 bytes
Sector size (logical/physical): 512 bytes / 512 bytes
I/O size (minimum/optimal): 512 bytes / 512 bytes
Disklabel type: gpt
Disk identifier: 7EED0FB4-482A-45A9-A7CE-55E525352534

Device              Start        End    Sectors   Size Type
/dev/nvme0n1p1       2048    1394687    1392640   680M EFI System
/dev/nvme0n1p2    1394688    1656831     262144   128M Microsoft reserved
/dev/nvme0n1p3    1656832  944373759  942716928 449.5G Microsoft basic data
/dev/nvme0n1p4  944373760  961150975   16777216     8G Microsoft basic data
/dev/nvme0n1p5  961150976 1968371711 1007220736 480.3G Microsoft basic data
/dev/nvme0n1p6 1968373760 1970401279    2027520   990M Windows recovery environment
/dev/nvme0n1p7 1970401280 1997346815   26945536  12.9G Windows recovery environment
/dev/nvme0n1p8 1997348864 2000408575    3059712   1.5G Windows recovery environment
I was able to figure out that /dev/nvme0n1p4 was the 8GB partition I created for swap and the /dev/nvme0n1p5 was the partition I created for root filesystem. Enable swap on the swap parititon
and format the partition for root filesystem into ext4.
mkfs.ext4 /dev/nvme0n1p5
mkswap /dev/nvme0n1p4
swapon /dev/nvme0n1p4
Now that we are ready with filesystems, we can go ahead mounting them and starting installation.
Step 7: Mount partitions and install needed packages
Create a directory /mnt/root to mount the root filesystem and EFI system partition on /mnt/root/boot.
mkdir -p /mnt/root /mnt/root/boot
mount /dev/nvme0n1p5 /mnt/root
mount /dev/nvme0n1p1 /mnt/root/boot
Open the file /etc/pacman.d/mirrorlist in a text editor like vim or nano. Bring a few mirror URLs closest to you geographically to the top of the file. Since, I live on the west coast of USA,
I brought a few US west coast pacman mirrors onto the top. This should ensure that the package installation command runs fast.
Now install the necessary packages using pacstrap.
pacstrap /mnt/root base linux linux-firmware base-devel grub os-prober intel-ucode alsa deepin deepin-extra sudo lightdm lightdm-deepin-greeter
I like deepin as my desktop environment as it looks beautiful and has a perfect traditional desktop look and feel. If you want Gnome, or KDE, or LXDE, or LXQT, or XFCE or any other desktop environment instead, feel free to modify the above command and install corresponding packages.
Step 8: Configure base system
Generate an fstab file by running genfstab -U /mnt/root >> /mnt/root/etc/fstab.
Now chroot into the system to configure some other necessary stuff. Arch installation image has a handy chroot wrapper script named arch-chroot, which chroots into the installed root filesystem
and also binds necessary virtual filesystem mounts like proc, sys and dev correctly from the currently running installation OS.
arch-chroot /mnt/root
Set timezone
Set the time zone by creating a symlink to the zoneinfo file for your region at /etc/localtime. Command below is for US West Coast. You can change it according to your region.
Also, set the clock to use UTC.
ln -sf /usr/share/zoneinfo/Americas/Los_Angeles
hwclock --systohc
Set locale
Open /etc/locale.gen in vi or nano and uncomment the en_US.UTF-8 UTF-8 line. Then run locale-gen. After this, open /etc/locale.conf and add a line LANG=en_US.UTF-8.
Network configurations
Create the hostname file /etc/hostname and add a name for your laptop, for example my-xps. Also update the hostname in /etc/hosts so it looks like below:
127.0.0.1   localhost
::1         localhost
127.0.1.1   my-xps.localdomain my-xps
Deepin comes with NetworkManager but it didn’t work as expected for me for connecting to WiFi. So you might want to disable NetworkManager and install netctl.
systemctl disable NetworkManager
pacman -S netctl wpa_supplicant dhcpcd
You can also create a netctl profile right away so that you do not need to struggle connecting to the internet when you reboot after the installation is finished.
Create a file named /etc/netctl/MyWiFi and put the following content. This assumes that your home WiFi network name is MyWiFi. I also faced lag and disconnection issues with
5GHz wifi networks so for now I am using a 2.4GHz network only. I haven’t spent time figuring out the cause and fixing it, I may update this article when I do.
Description='My home WiFi connection'
Interface=wlp2s0
Connection=wireless

Security=wpa
IP=dhcp

ESSID='MyWiFi'  # <=== Put your WiFi network's name here
Key='12345678' # <== Put your WiFi password here
Build initramfs
Run mkinitcpio -P to build the initramfs.
Set root password
Set a root password by running the passwd command.
Step 9: Configure Grub
During pacstrap we installed grub and os-prober so, now we just need to install grub and create a config for it. If os-prober is installed, grub-mkconfig command automatically
detects Windows partition, if any and adds an entry for booting into it in the boot menu.
grub-install --target=x86_64-efi --efi-directory=/mnt/root/boot --bootloader-id=GRUB
grub-mkconfig -o /boot/grub/grub.cfg
Step 10: Create a user and enable sudo
Create a non-root user and add it to necessary groups (at least wheel). Replace the username master in below command with your desired username.
useradd -m -G wheel -s /bin/bash master
Also set a password for this account by running passwd master.
Run visudo to open sudoers file. Find the line that allows members of group wheen to run sudo commands without password and uncomment it. It should look something like below:
%wheel ALL=(ALL) NOPASSWD: ALL
However, it is not recommended for everybody to configure sudo without password. You might want to configure it to be used with password instead by uncommenting the following line instead.
%wheel ALL=(ALL) ALL
Step 11: Prepare for reboot
Now your arch installation is ready to boot into. But before that, we need to perform one final configuration, which is to configure lightdm - the display manager to use deepin’s greeter.
Open the file /etc/lightdm/lightdm.conf. Find the line that says #greeter-session, uncomment it and update it to use deepin’s greeter as shown below.
greeter-session=lightdm-deepin-greeter
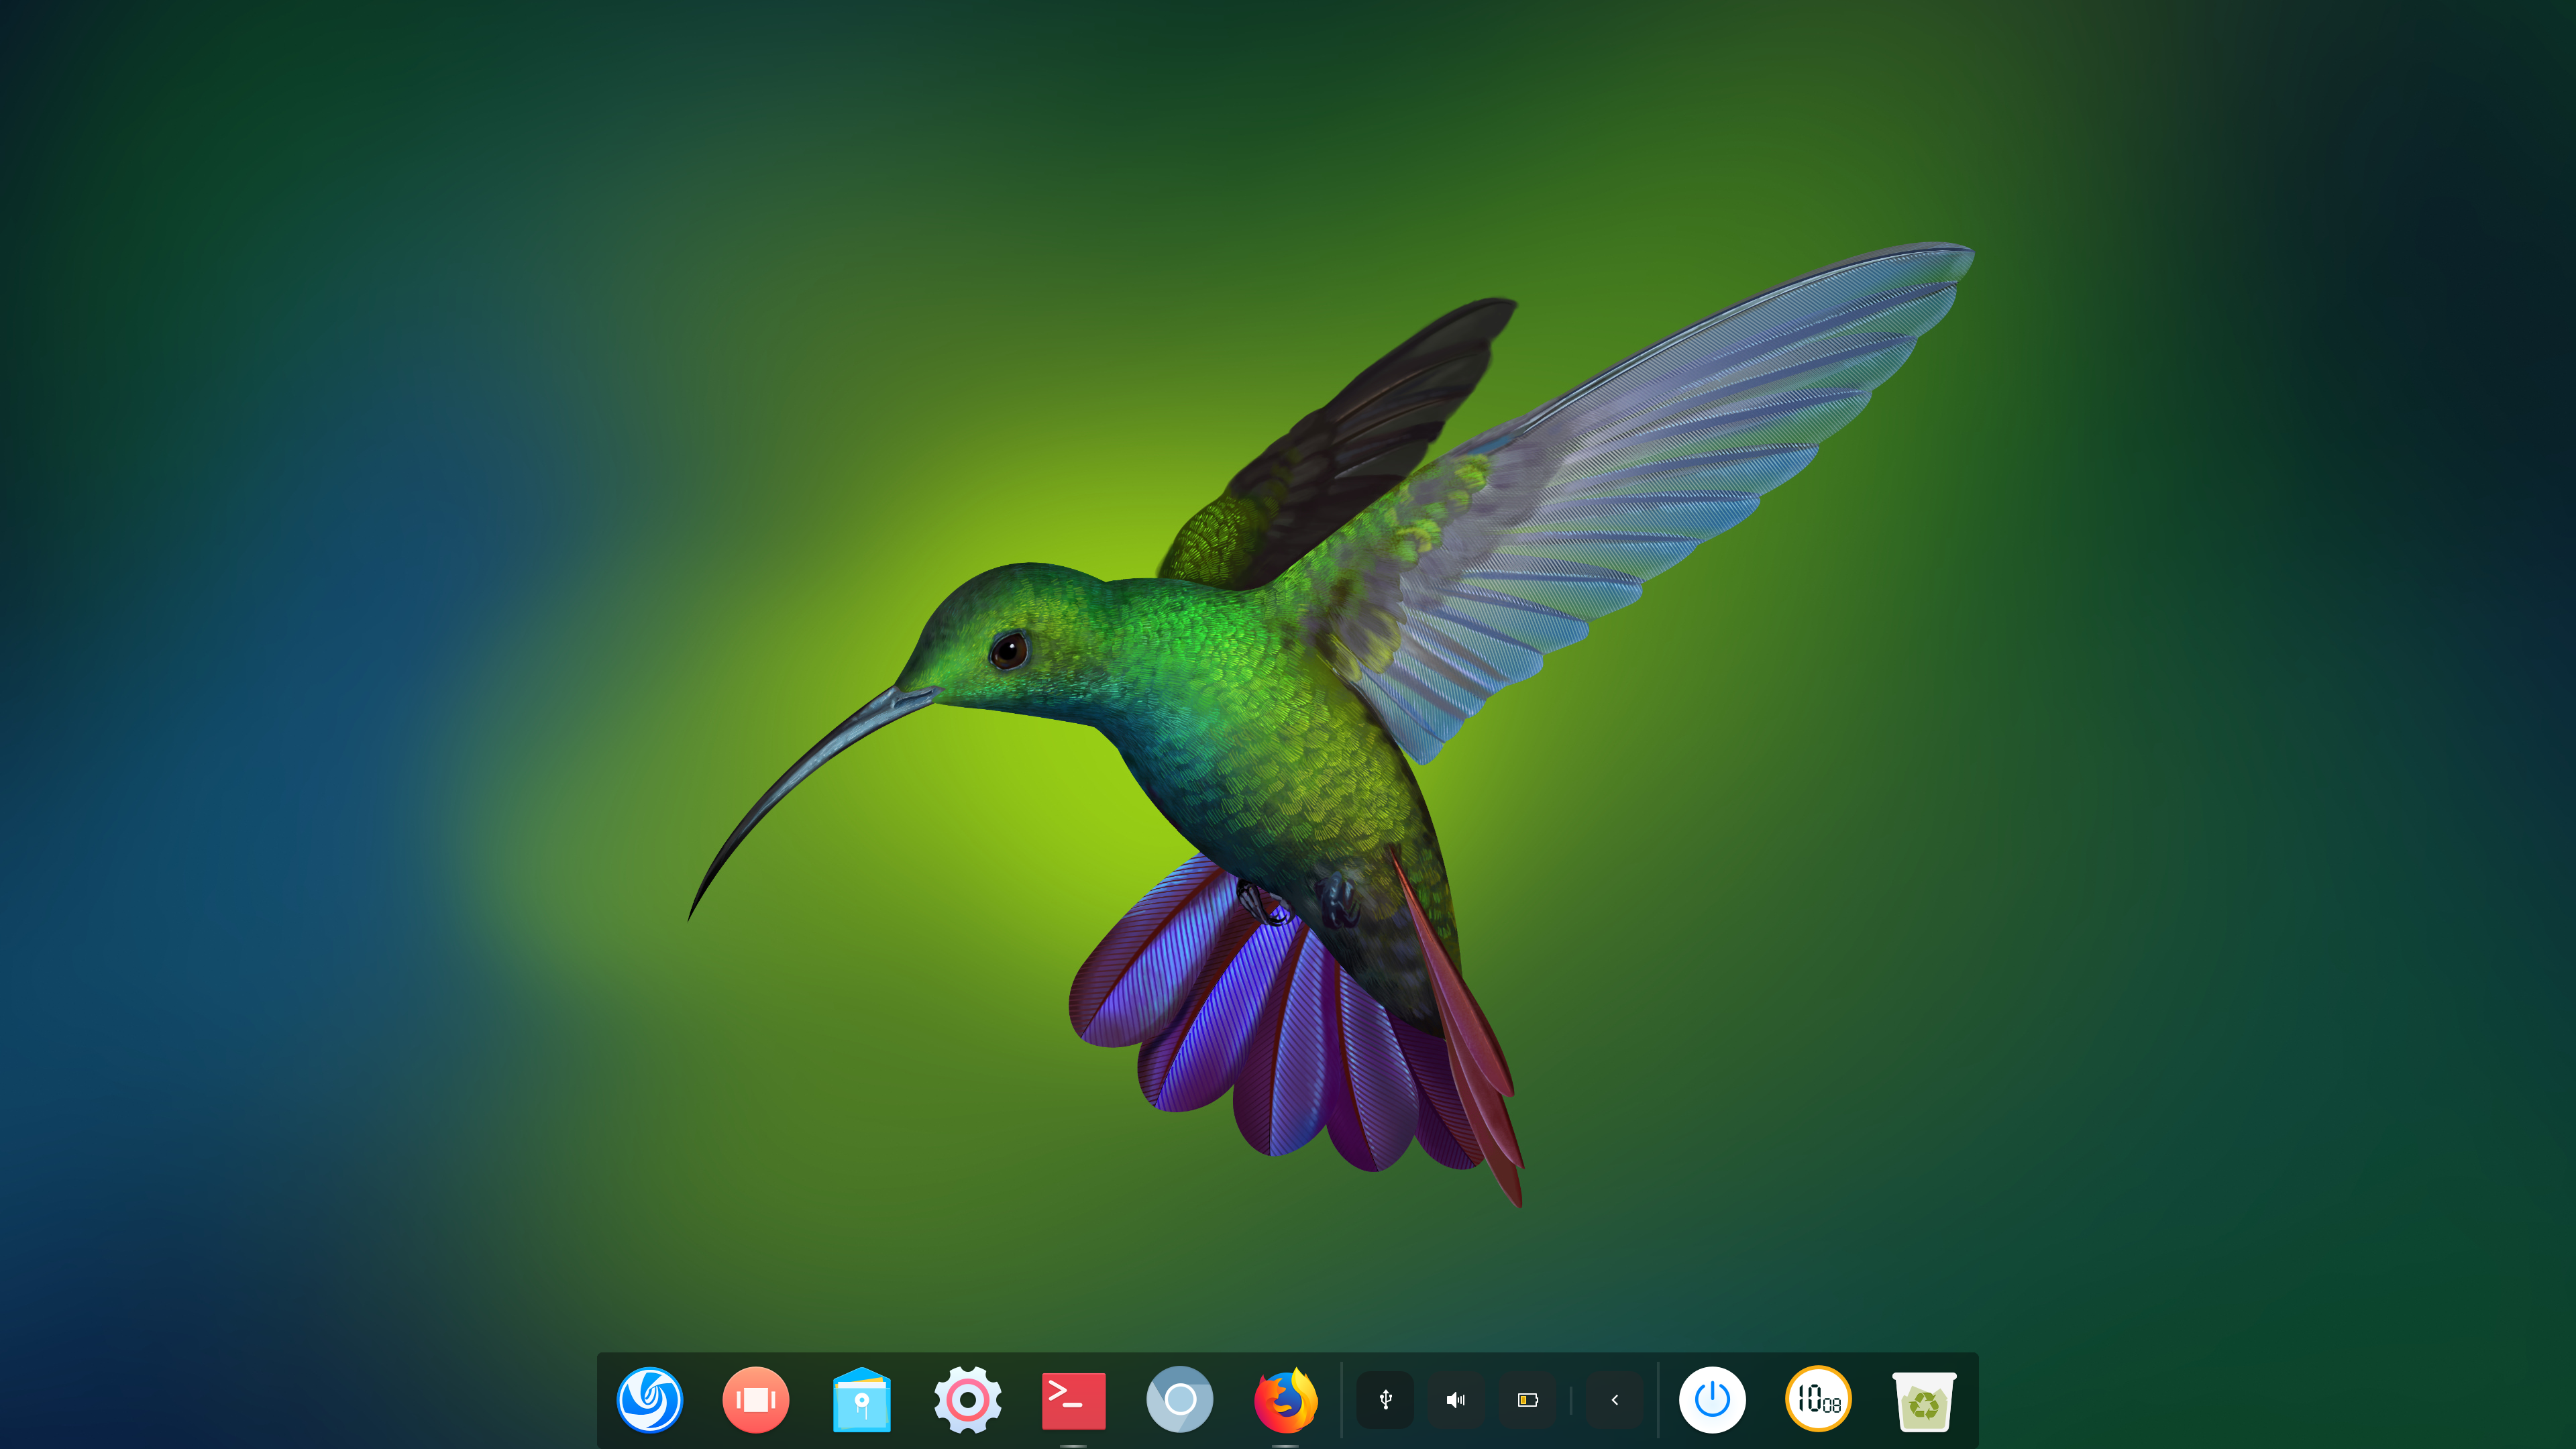
Also, enable lightdm by running systemctl enable lightm. Now reboot by typing reboot. You should be greeted by a beautiful login screen. When you login, you will see a desktop resembling the below
screenshot.
Deepin desktop comes with a dock by default but I prefer a task bar instead. You can right click the dock and change the mode to Efficient Mode.
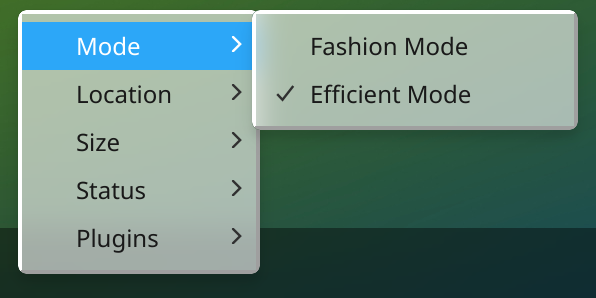
You might also want to change the size of icons to small instead of large.

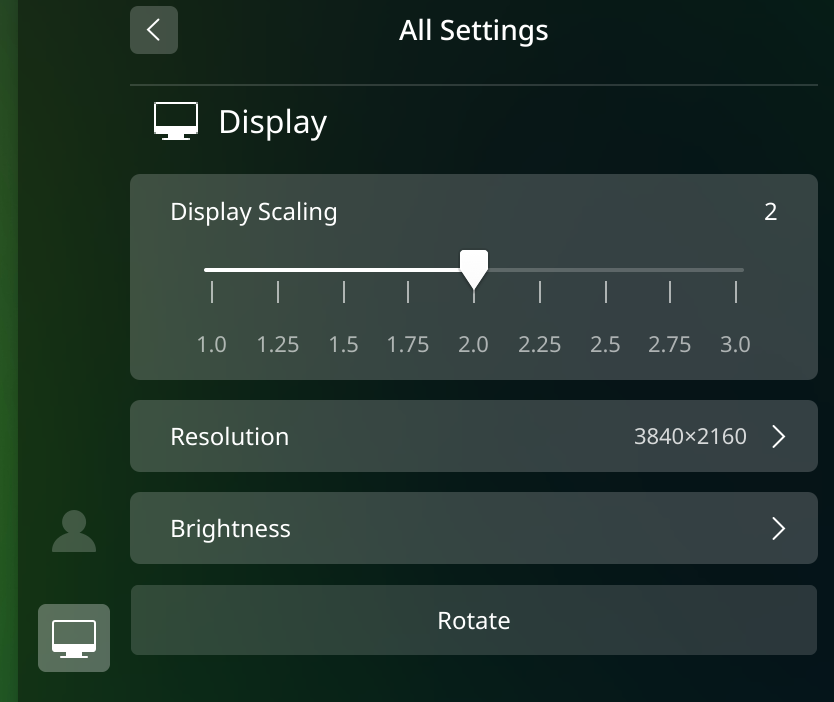
If the font sizes look too small or too large, you can adjust the scaling factor by right clicking the desktop, choosing Display Settings as shown in the screenshot below.
Step 13: Fix windows
Since we overwrote Windows’s EFI partition, it will refuse to boot. But there is a simple trick to fix that. You just need to boot Windows in safe mode once and it figures out stuff automatically. Kudos to Microsoft for this! If you try booting Windows from the Grub menu it will get into the dreaded blue screen of death. But from there you will get an option to attempt to diagnose and fix boot problems. There you can choose to boot into safe mode. Once you have successfully made it into safe mode, you should also make a change in Windows registry so that it treats hardware clock to be in UTC. This way the time shown in Linux as well as Windows will be similar. For that, just open a command prompt with administrator privileges and run the following command:
reg add "HKEY_LOCAL_MACHINE\System\CurrentControlSet\Control\TimeZoneInformation" /v RealTimeIsUniversal /d 1 /t REG_QWORD /f
Or you could open regedit and manually navigate to the above key and add a new QWORD value of 1 for RealTimeIsUniversal.
Step 14: All set
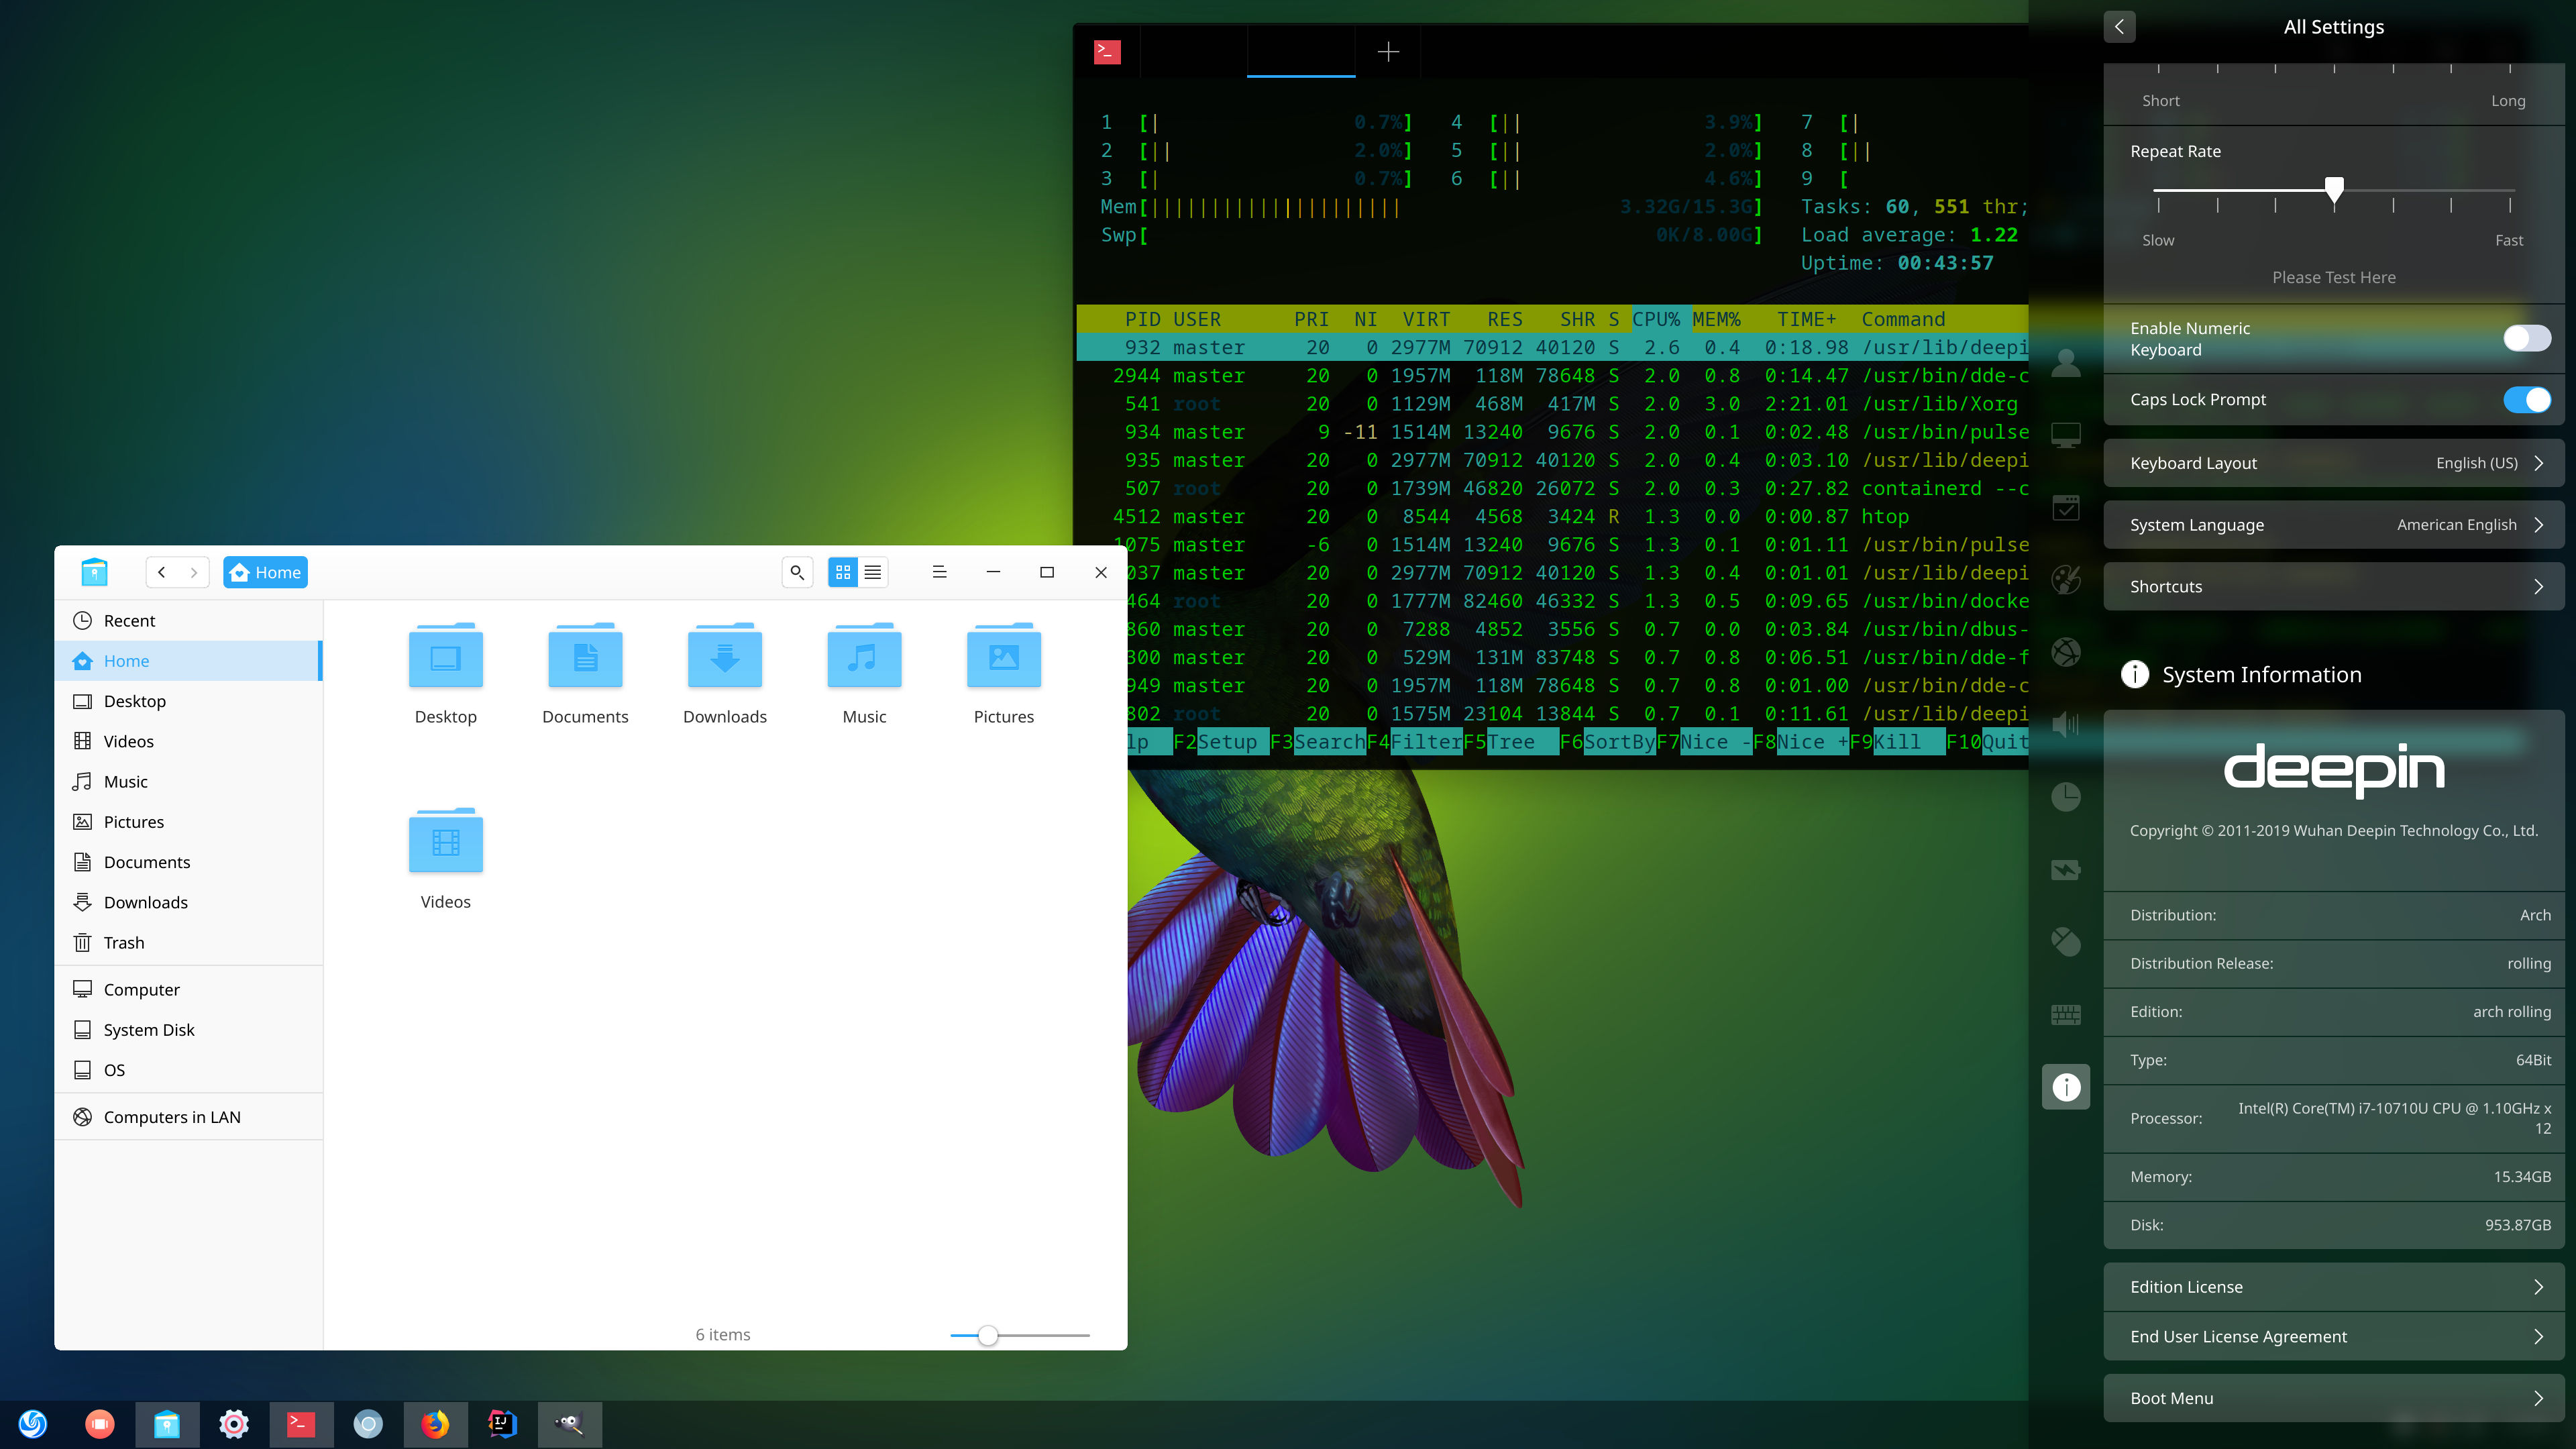
Assuming that you sailed through the process smoothly, congratulations! You now have your Dell XPS 13 with a dual boot setup of Windows 10 and Arch Linux. If you are a developer like me, you might want to change your shell to zsh, install Git, Vim, htop, Ruby, NodeJS, JDK, Postman, Docker, Visual Studio Code, IntelliJ Idea Community Edition and other development tools and platforms to facilitate your development workflow. As general utilities, you might want to install Gimp for photo editing, imagemagick, VLC media player, xarchiver, p7zip-full, unrar, Evince for PDF viewing, Chromium and Firefox for web browsing and Audacious for listening to your music collection.
Here’s an obligatory screenshot (compressed JPEG) of my final setup.
Known Issues
I have found the following issues on my Dell XPS 13 (with factory installed Windows) while using Arch Linux:
- Looses connection to 5G WiFi network intermittently (however 2.4GHz networks work perfectly)
- Cannot use NetworkManager to connect to WiFi networks. Netctl works flawlessly, but to make your life easier install wifi-menu from AUR.
archlinux dell-xps-13